How to add or edit a policy?

Basics about policies
Policies grant or limit access to something already controlled by a role or a circle: its domain. Since domains give exclusive control, policies are needed to further refine who and/or how someone may impact a domain.
Domains and policies always go together. To really understand policies you need to understand domains, what they are and how they work. See this article.
Most policies are created during Governance meetings. However, you can also create and update policies at any time, outside meetings (asynchronously).
A useful way to think about policies is to start by questioning what your role or circle controls. You can’t oversee what you don’t control. For example, if you want to limit which roles can make changes to the website, your first question should be: “does my role control the website?”
⚠️ Important: To add a policy to a role or a circle, a domain must first be defined.
Add or edit a circle's policy in a meeting
You might want to discuss the creation/edition of a policy directly with your team in a meeting. You can submit your idea two ways:
👉 If you have already created you evolution (adding or editing a policy) as a proposal you can import it to the meeting, no matter if it's been saved as a draft in your Proposals app or if you've already submitted it asynchronously.
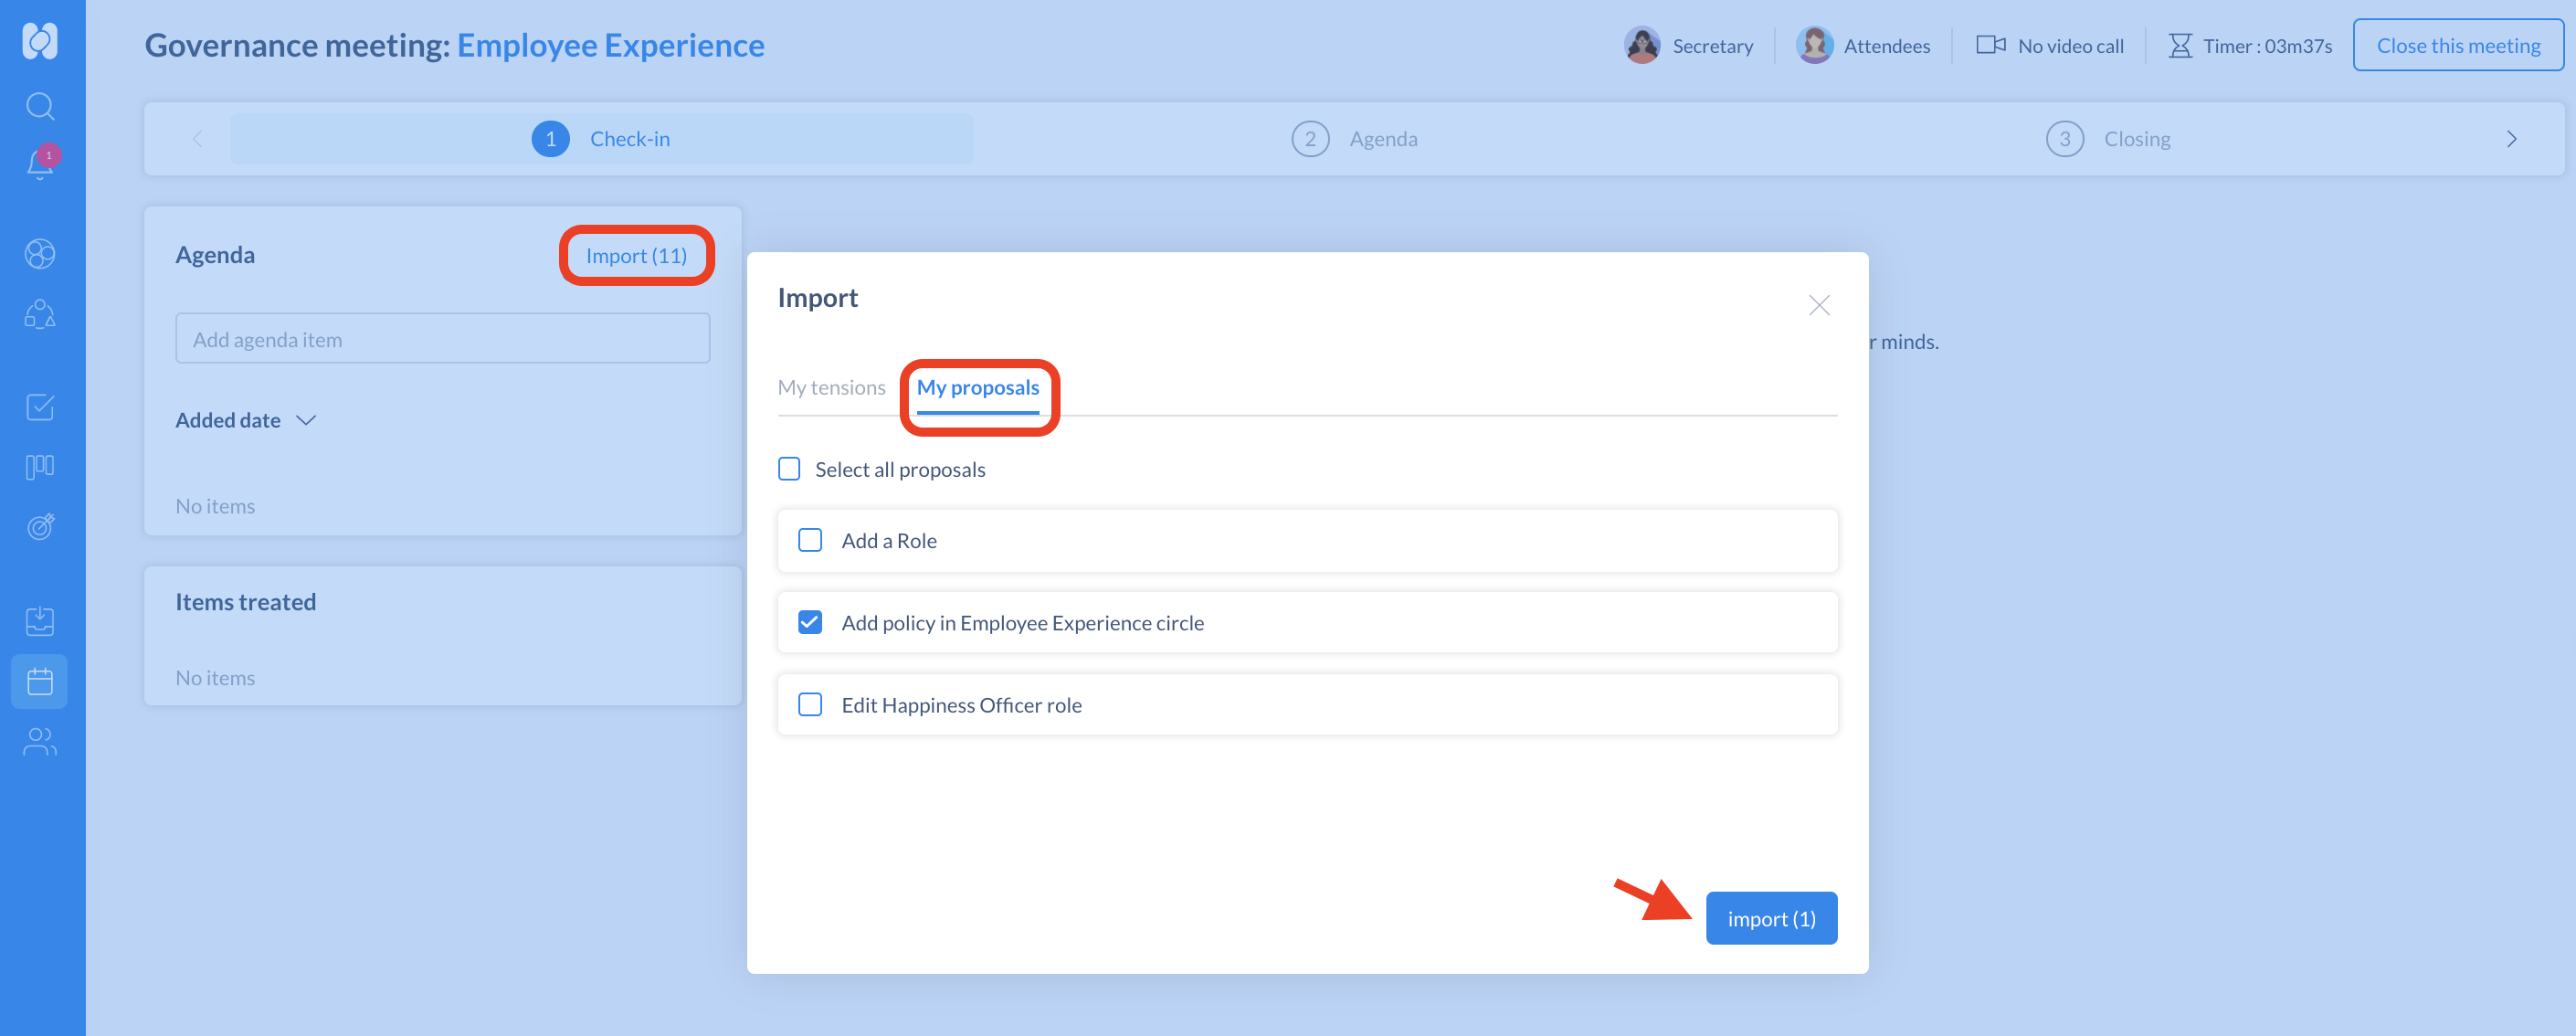
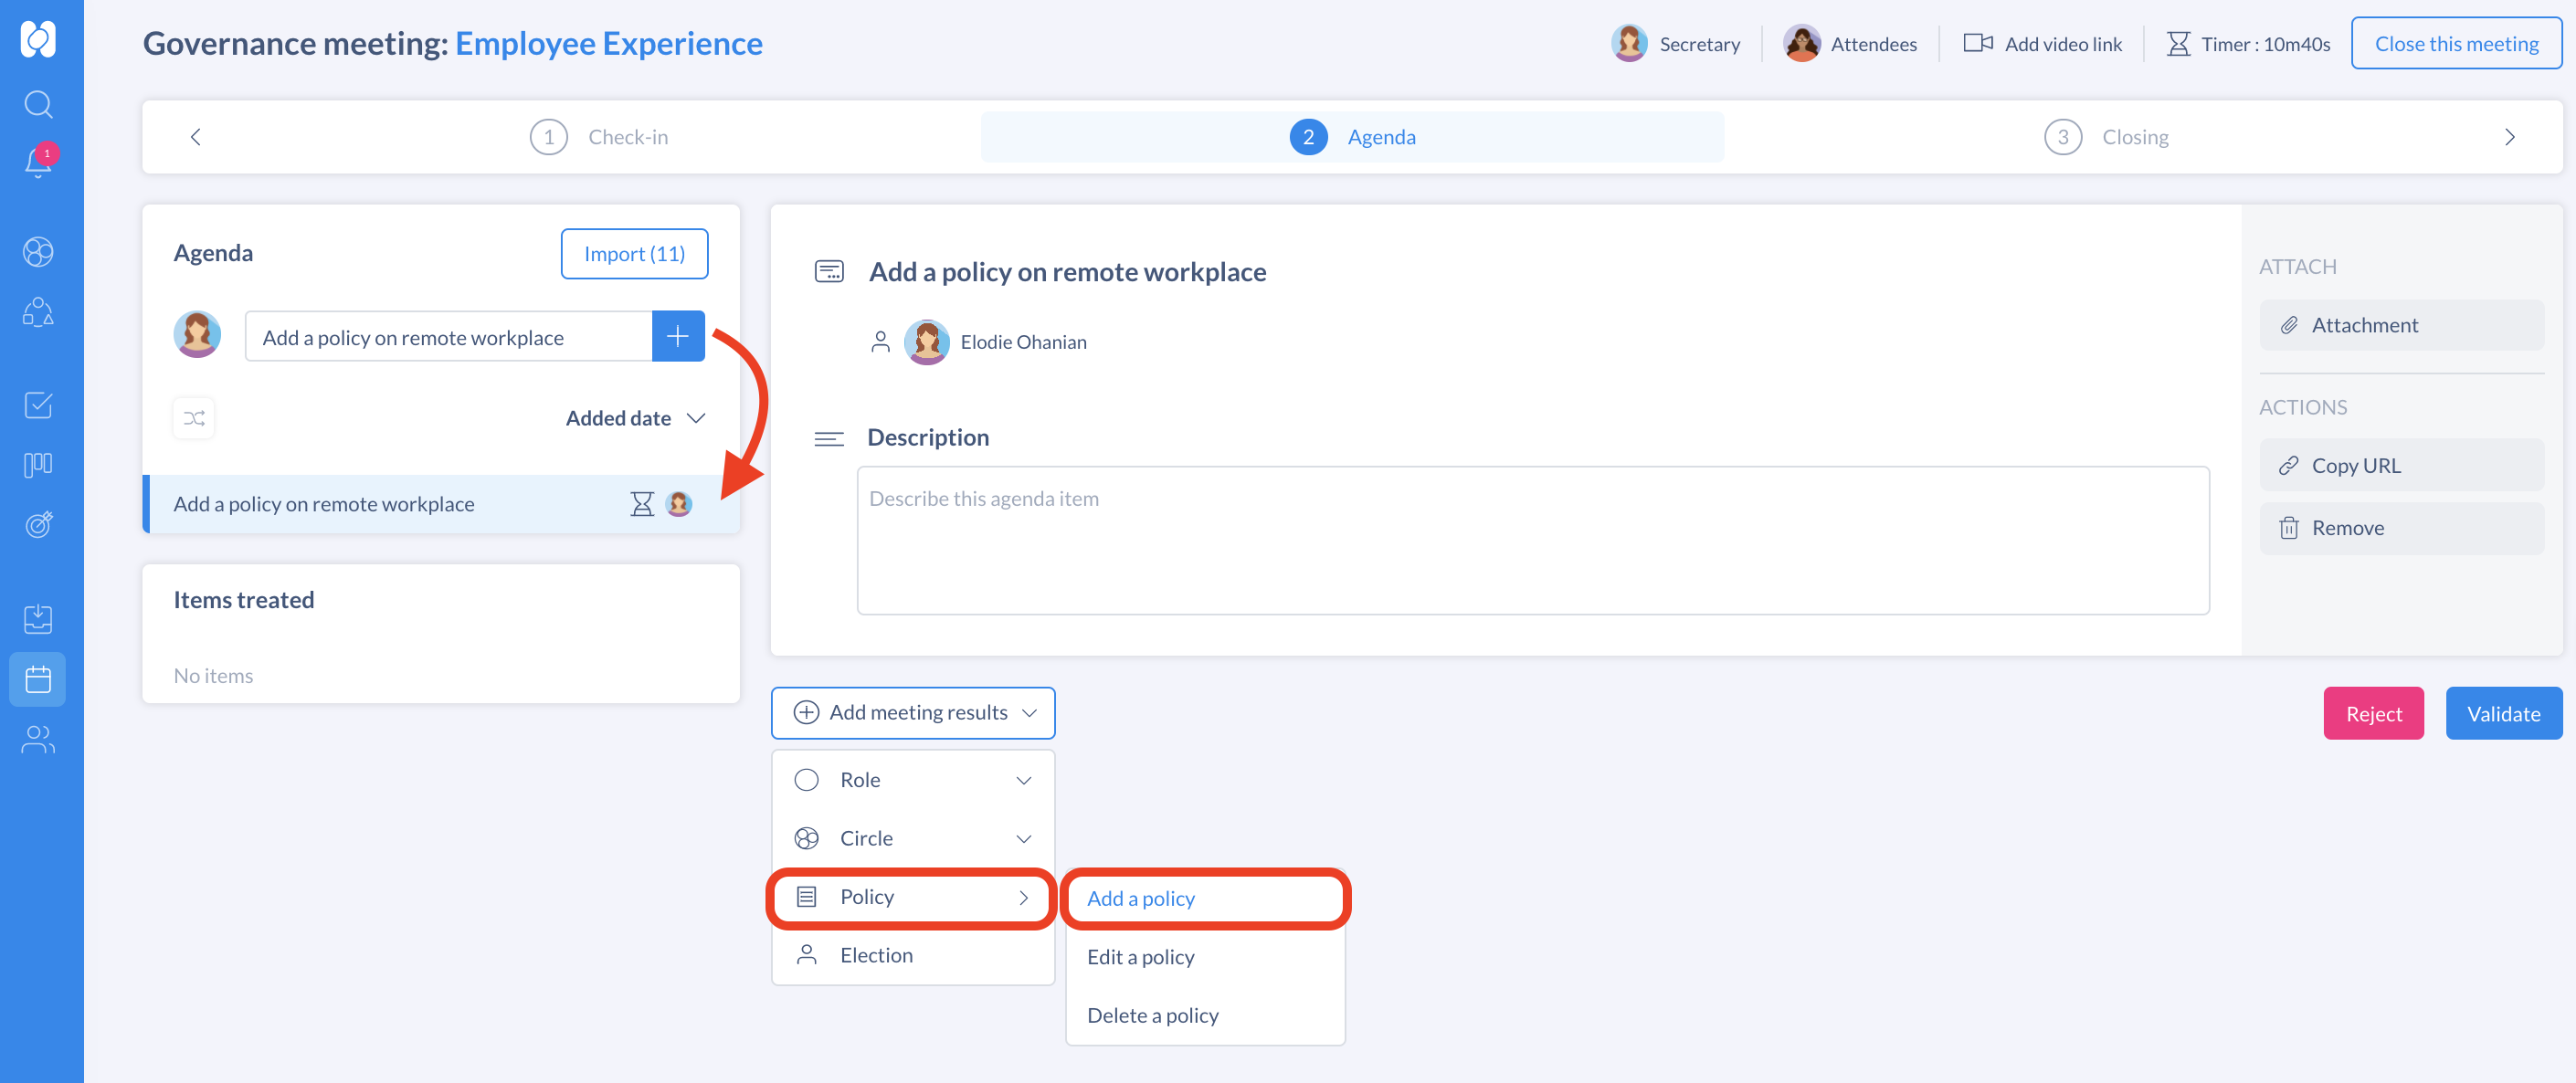
👉 You can add your idea to create/edit a policy as an agenda item to the meeting. The meeting secretary will then select it during the Agenda step to create the evolution as the meeting goes, with your circle. As the meeting secretary:
- Click on Add meeting results
- Select Policy then Add a policy / Edit a policy
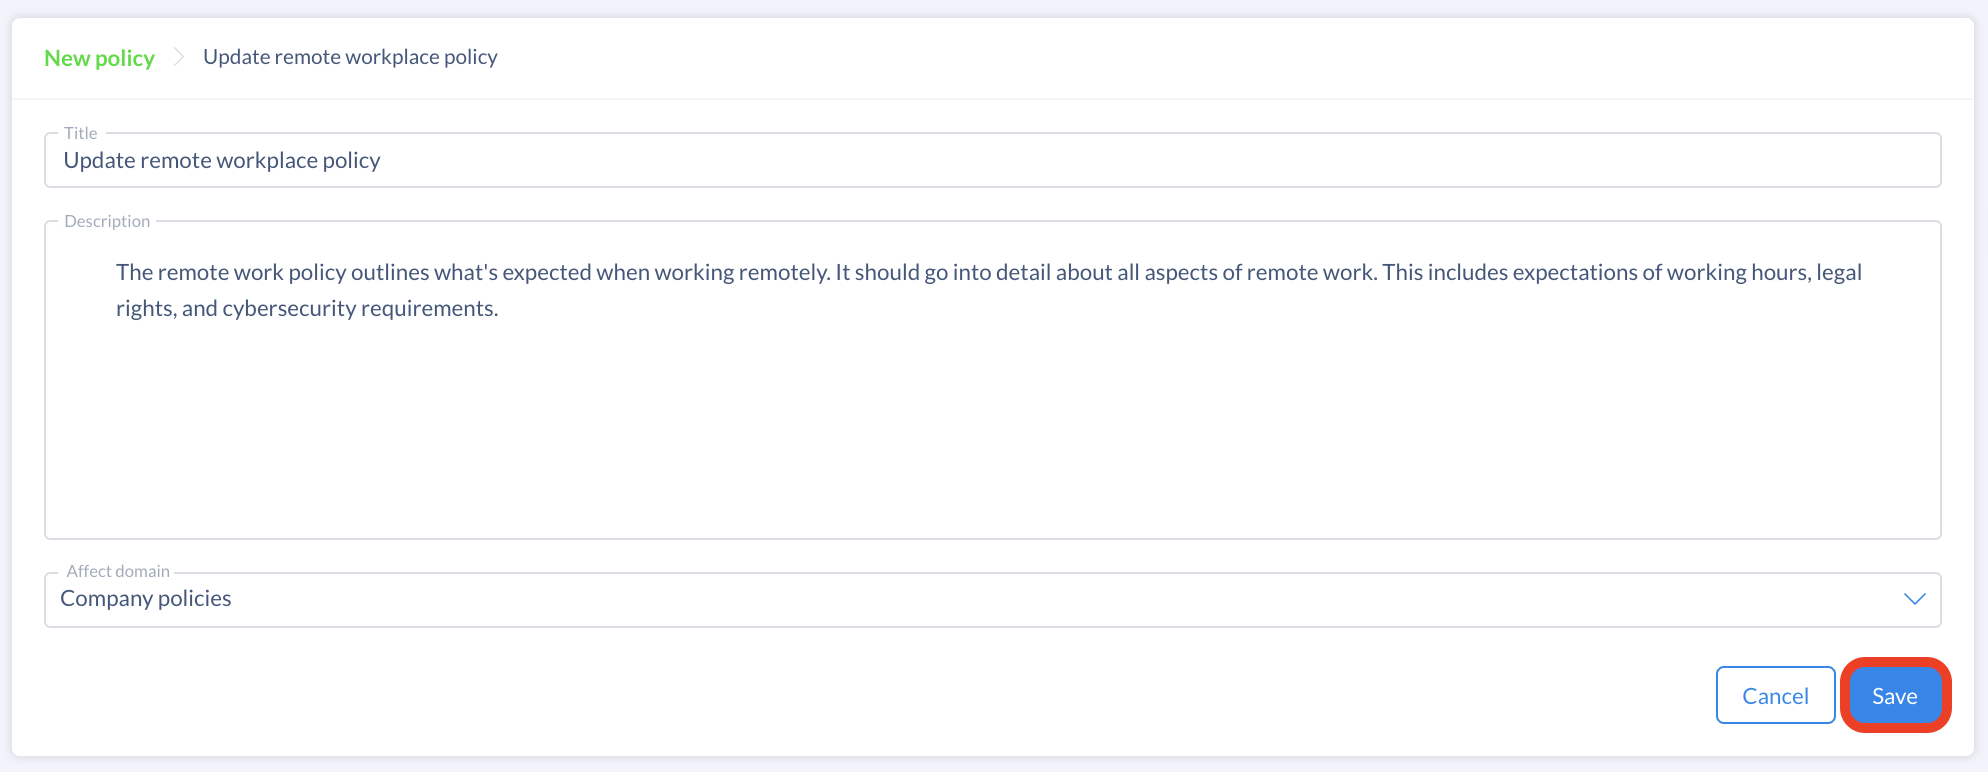
- Fill in the name and description of the policy and affect a domain or edit its information
- Click on Save
Once the agenda item is validated by the secretary after all the meeting participants consented to the evolution, the policy is created/edited and can be viewed under the Policies section on the circle page.
Add or edit a circle's policy outside a meeting
If a circle owns a domain, then any circle member can choose to add a new policy or even decide to edit an existing one.
- Go to the circle page
- To add a policy, click on the “+” icon in the Policies section
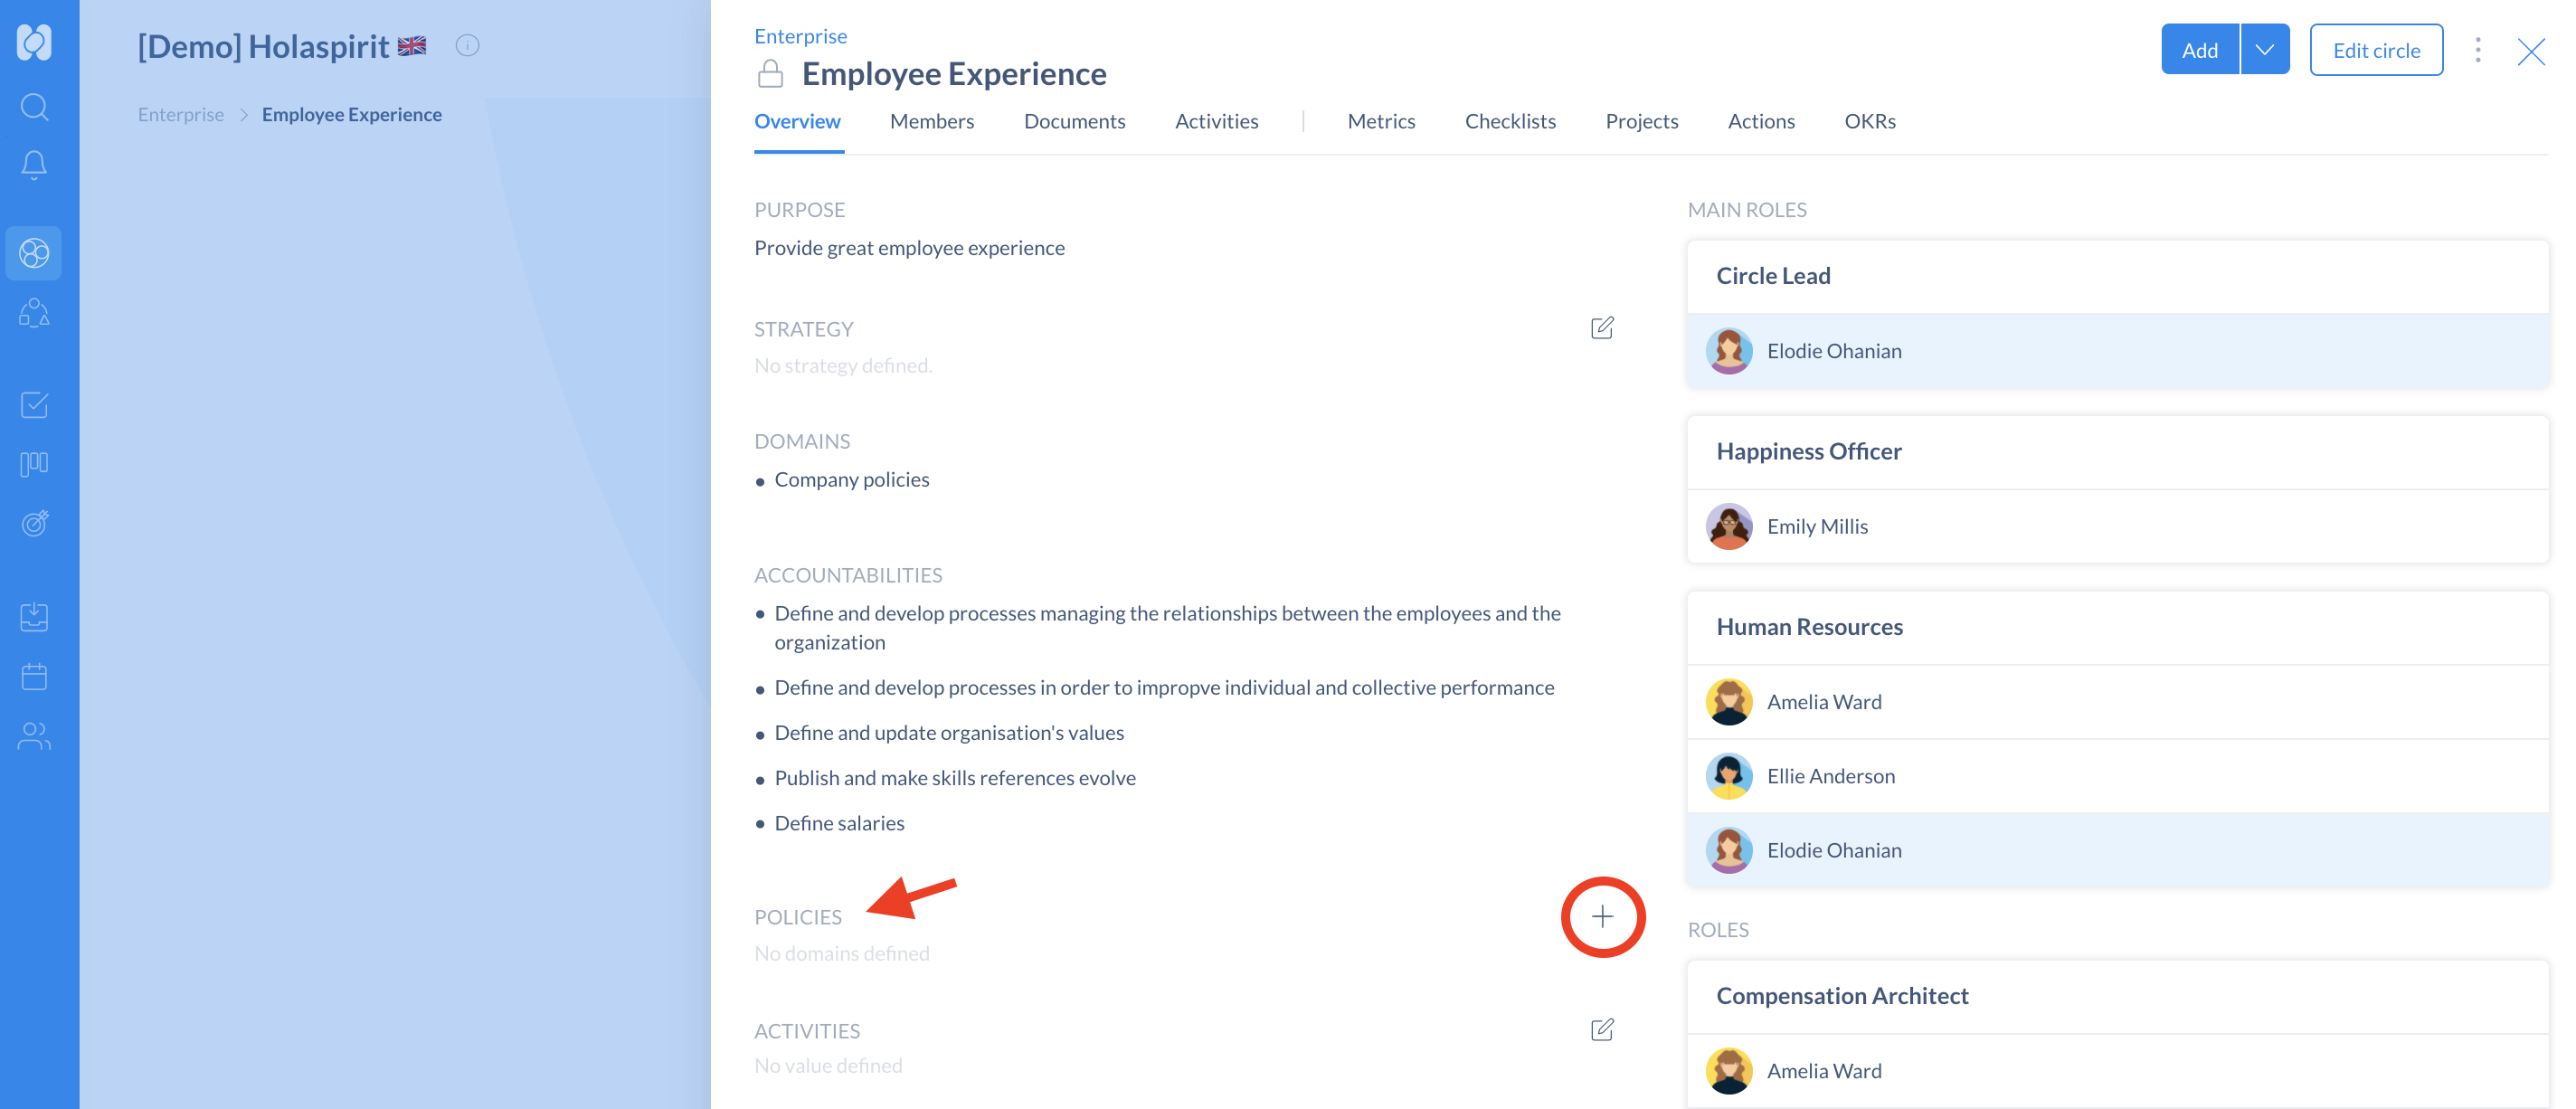
- To edit a policy, click on the policy itself and then on the edit icon
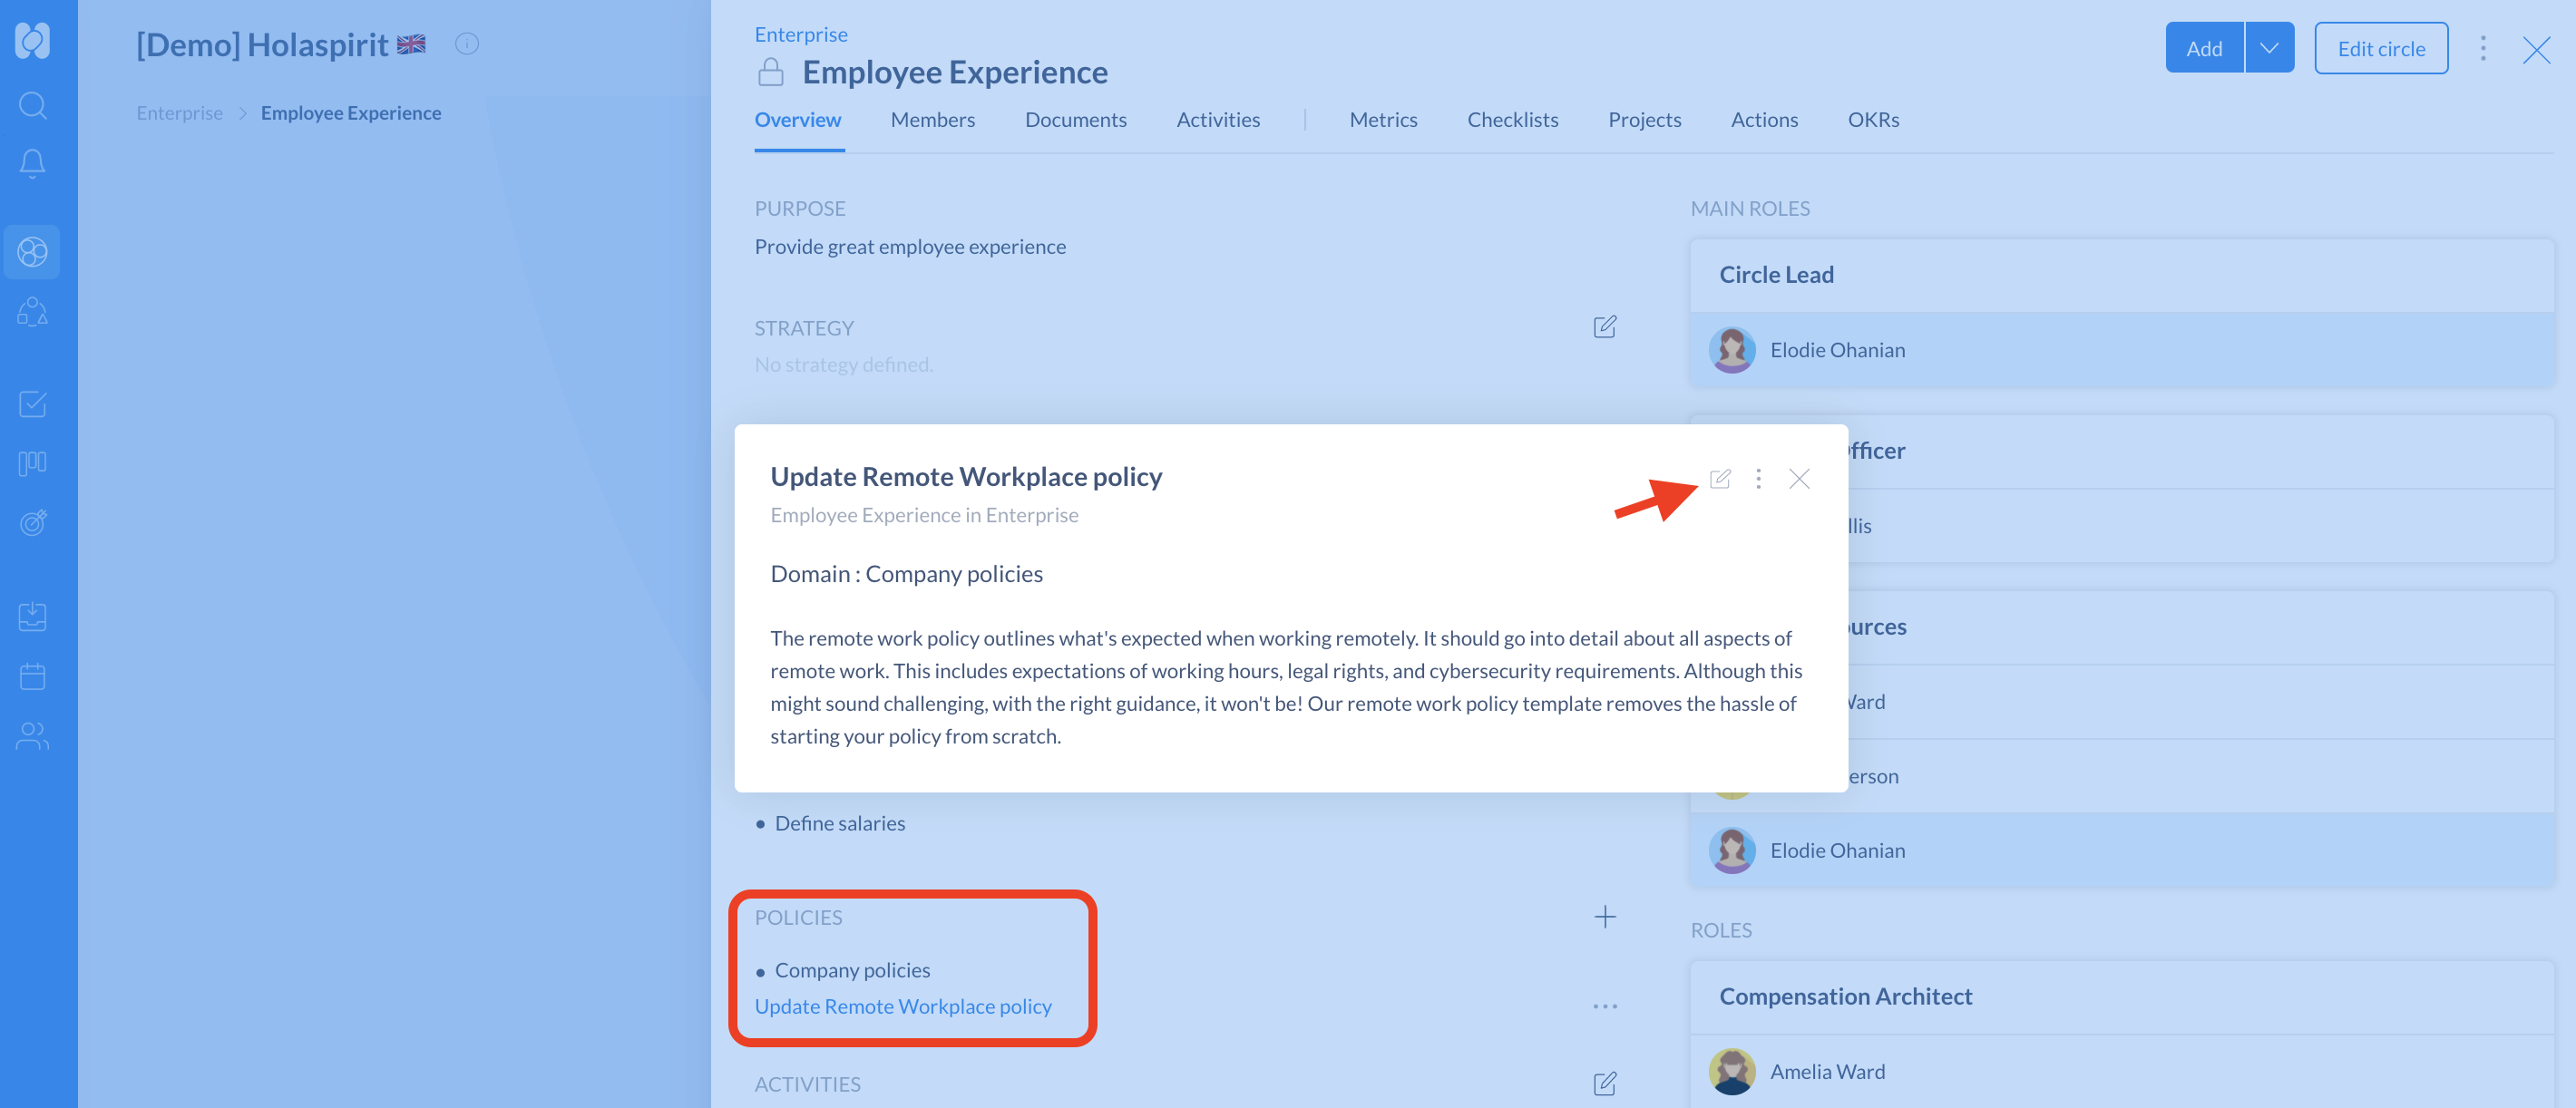
- Fill in the name, description and choose the domain linked to the policy or edit its information
- Add a reason as to why you are adding/editing the policy (optional)
The next steps depend on the decision making settings set for your organization.
If your organization is set up in free decision mode, click on Validate to confirm. Your evolution will be implemented right away
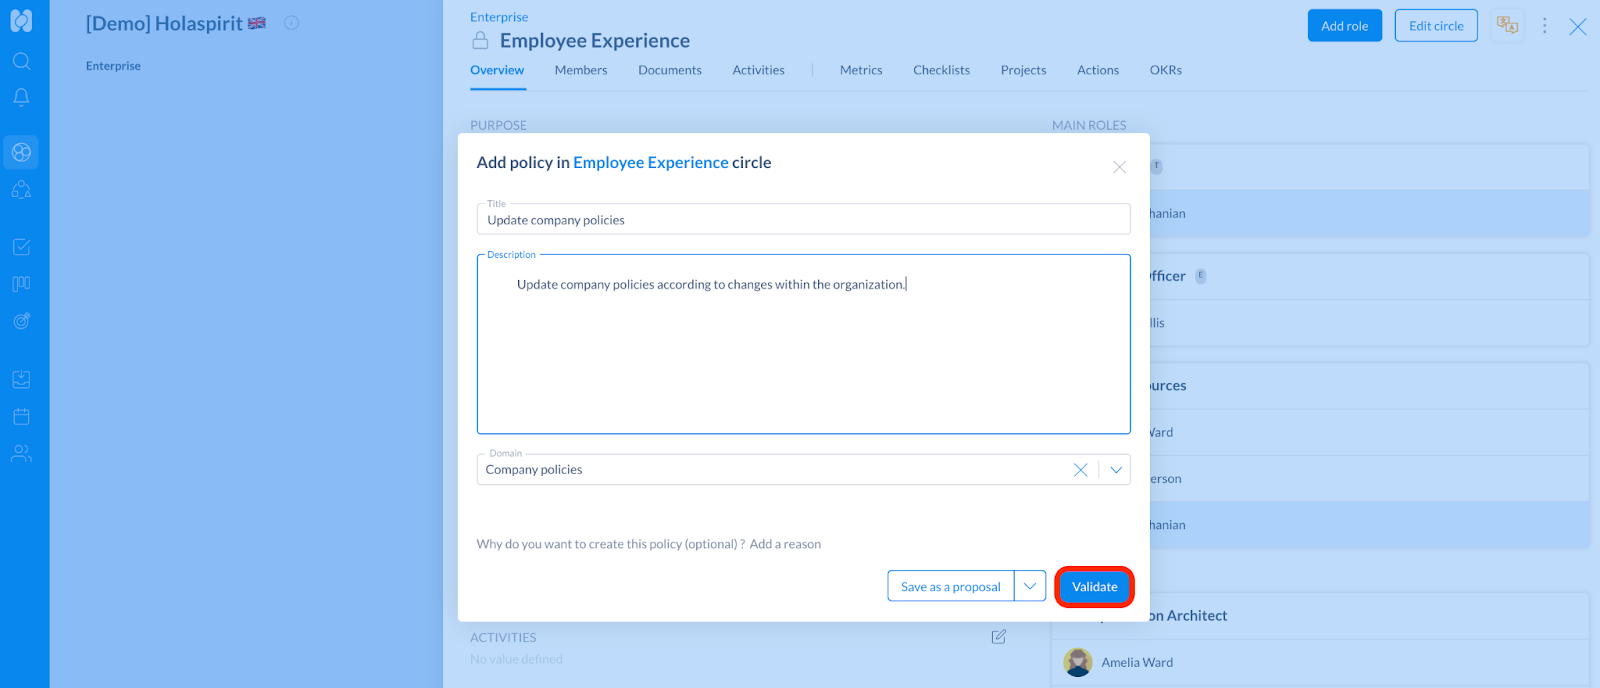
If your organization is set up in consent decision mode you have three option:
- Submit: your proposal is immediately be sent to the other circle members for them to validate or reject. If there is no objection within the validation period, your evolution implemented.
- Save as a proposal: save a draft of your proposal in the Proposals app to review, edit and submit when you are ready.
- Add to a proposal: if your evolution echoes to another one of your existing proposals, simply add it to that proposal saved in your Proposals app.

The evolution will only appear on the circle page once validated by the other members of your circle. Find out more about how to create, submit and track proposals in here.
Create or edit a role's policy
Any member assigned to the role can add or edit a policy for their role.
- Go to the role page
- To add a policy, click on the “+” icon in the Policies section
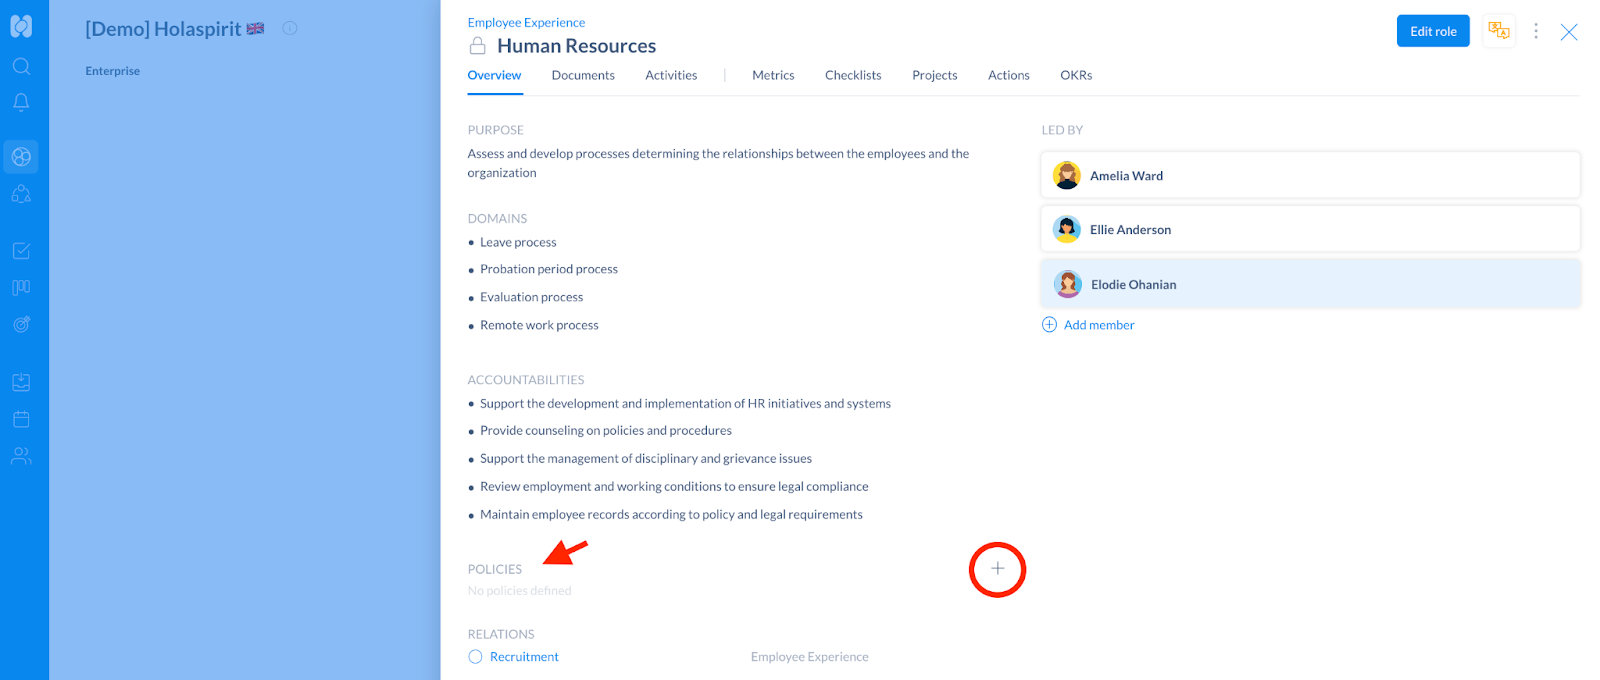
- Fill in the title and description of your policy and select the domain linked to the policy
- Click on Create

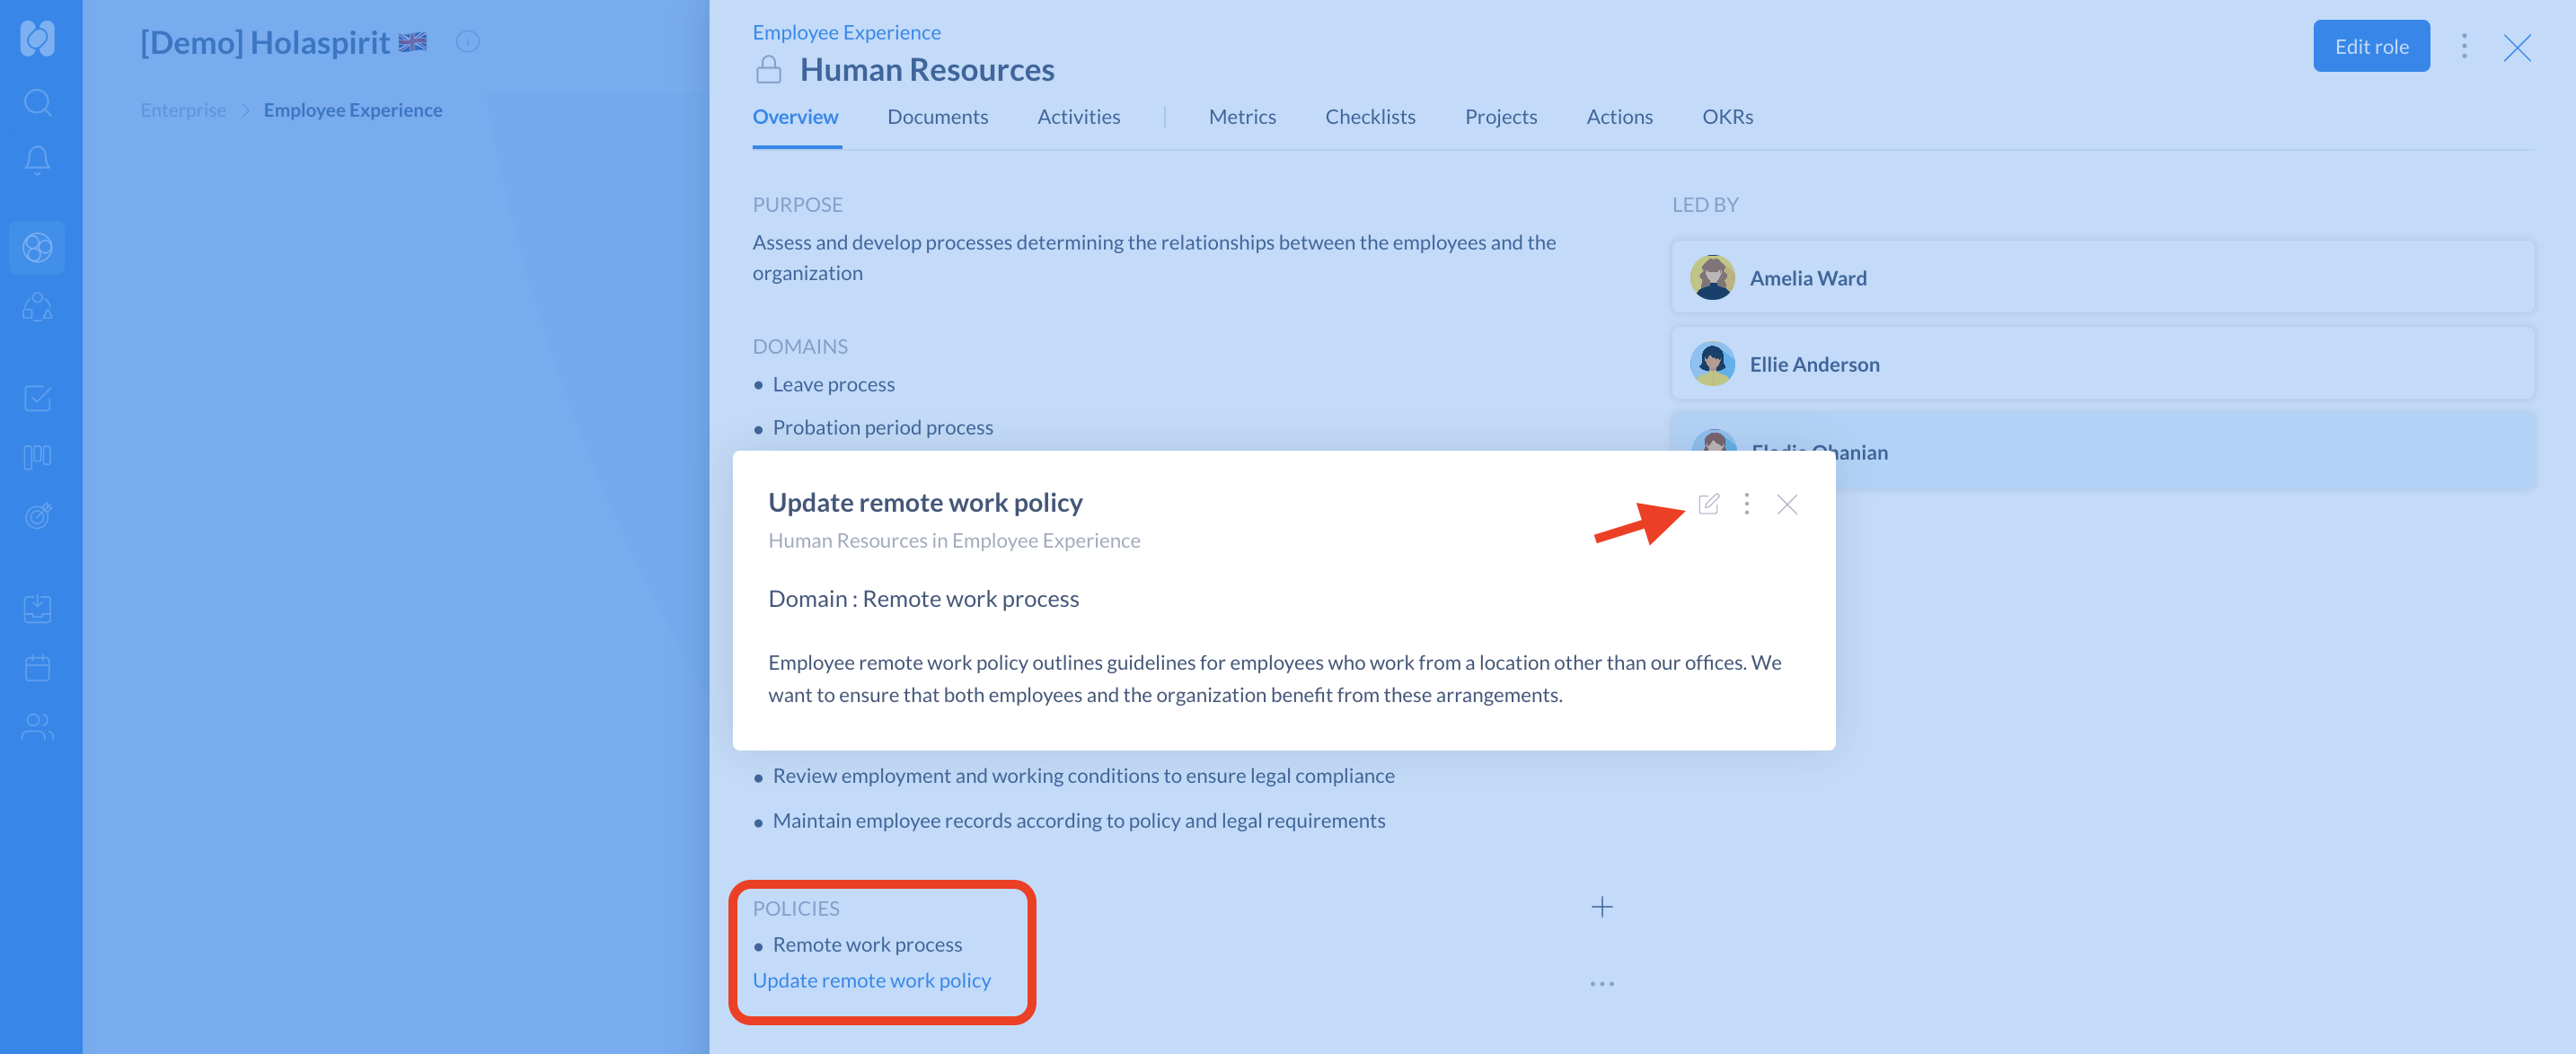
- The policy will appear under the Policies section. You can edit or read the policy by either clicking on it or on the three dots next to it.
Note: In the role's activity thread, you can see who’s made changes to the role and, inherently, to its policies.

Get started with Holaspirit today

New ways of working for organizations of the future.


